27 MARCH 2012
After
attending Arduino workshop last week, I tried to do simple buzzer program. This
buzzer is planned to be insert in my timer. The purpose is, after certain time,
for example, 2 minutes, the buzzer will sound. I set it 2 minutes time is just
for demo on the presentation day. For real application, I will set the buzzer
to sound after 8 hours. It is to alert user to switch off the supply and rest
the motor for few hours before start use it again. The existing ripple mattress
doesn’t have this function. What makes it cross my mind to add these features
is, in real world, nurses at hospitals or users often forget to switch off the
supply. This could damage the motor; and reduce its lifetime if use in 24 hours
continuously.
First
of all, I construct simple buzzer circuit
- Connect a wire (blue wire in photo below) from pin 4 to the breadboard.
- Connect a wire (blue wire in photo below) from pin 4 to the breadboard.
- Connect the
other side of the wire to the 100R resistor.
- Connect the 100R resistor to the buzzer.
- Connect the buzzer to the other (yellow in photo) wire.
- Connect the wire to the GND pin on the Arduino.
- Connect the 100R resistor to the buzzer.
- Connect the buzzer to the other (yellow in photo) wire.
- Connect the wire to the GND pin on the Arduino.
so,
in order to start programming using Arduino software, we have to install the
software in our laptop. Just follow the installation instruction by clicking “Next”
until “Finish”. Then, follow this simple
instruction:
1) Check Arduino ports at our Control Panel. Click System.
2) In System Properties, click Hardware, then Device
Manager
3) In Device Manager, see under Ports (COM & LPT).
Make sure the ports to be set in the Arduino are the same as appear in Device
Manager. for example, in the device manager shows COM19,same as in Arduino.
Don't forget to set Arduino Uno board (refer to the board that you use) in Tools.
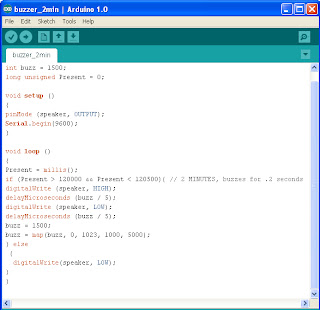
Here, i provide the example of 2 minutes program. To test the program, we have to compile it by click upload symbol à
Here is the result:


